Pages

Rabu, 31 Oktober 2012


Program yg ngerubah foto jenis bitmap (pixel) ke dalam jenis vektor...

Feature:

  1. Fully automatic vectorization
  2. Easily Convert Bitmap Images To Clean Vector Art
  3. Basic vectorization mode, with easy-to-choose settings
  4. Advanced vectorization mode, with fine-grained control
  5. EPS, SVG and PDF vector output
  6. AI, DXF vector output
  7. EMF vector output
  8. PNG bitmap output
  9. JPG, TIF, GIF, BMP bitmap output
  10. Bitmap output, any zoom
  11. Powerful preview to inspect the result in detail
  12. Super-convenient drag-and-drop interface
  13. Vectorize very large images

Selasa, 30 Oktober 2012


Software Snapseed 1.2 | 24.8 MB

Snapseed is a new generation of photography software that inspires everyone to enjoy photography. High quality results are now fast, easy, and fun. Snapseed can be used to enhance, edit, email, and share photos via social networks in just a few seconds.
Key Features
• Tune Image—Quickly correct photos shot in difficult lighting situations, create depth and vibrancy with Ambience, or adjust White Balance, Saturation, Contrast and more
• Auto Correct—Automatically analyzes your photo and adjusts color and exposure, or you can use the sliders to add or reduce the enhancements
• Control Points—Make precise selections and enhancements in seconds with Nik Software’s revolutionary U Point technology
• Tilt-Shift—Creates a narrow in-focus area designed to simulate depth of field, common in a Miniature Scene look
• Details—Enhances details with traditional sharpening as well as Nik Software’s unique Structure control found in the professional Nik Software product line
• Crop & Straighten—Rotate or straighten with simple slider controls and select from a variety of standard aspect ratios while cropping

Senin, 29 Oktober 2012

Satu lagi software kecil tapi sangat inovatif yang pantas Anda coba. Clover versi 2.

Anda sudah pasti tidak terlepas dari penggunaan Windows Explorer di komputer/laptop Windows Anda, khususnya saat mengorganisir file dan folder, memindahkan, menyalin atau menghapus file-file. Penggunaan Windows Explorer sangatlah sering dan mudah. Namun, bagaimana jika kita membuat penggunaannya LEBIH MUDAH LAGI? Ada caranya!
Anda pernah menggunakan Google Chrome atau Mozilla Firefox? Tentu Anda pasti pernah melihat dan menggunakan fitur tab, yaitu untuk membuka beberapa halaman website dalam satu jendela browser.

Nah! Kita tambahkan fitur tab tersebut di Windows Explorer, agar kita bisa dengan mudah memindahkan atau menyalin file dari satu folder ke folder lainnya. Software Clover 2 akan membantu kita mewujudkannya. Cukup instal dan gunakan kemudahannya!

Buat teman-teman Anda iri, karena tidak semua komputer atau laptop memiliki fitur ini. :)
Perhatikan beberapa tampilannya di bawah ini (klik gambar untuk memperbesar):
Singkatnya, Clover adalah utilitas luar biasa yang membuat pengalaman browsing file menjadi benar-benar baru dan mudah. Software ini bekerja pada Windows XP, Windows Vista, Windows 7 dan Windows 8, di kedua edisi OS 32-bit dan 64-bit.

Free Download Software Clover 2: Tambahkan Tab Di Windows Explorer
sumber: anugrahberbagi

Minggu, 28 Oktober 2012

Software ini mampu memformat semua jenis SD memory card, SDHC memory card & SDXC memory card. SD Formatter menyediakan akses yg cepat dan mudah utk kapabilitas penuh terhadap memory card SD, SDHC dan SDXC.

Software SD Formatter mmg sengaja diciptakan khusus utk memory card yg berstandar SD/SDHC/SDXC. Sangat disarankan utk menggunakan tool SD Formatter ini sbg ganti utility format yg biasa ada pada OS yg digunakan utk bermacam tipe media storage. Karena dgn menggunakan utiliti utk memformat yg khusus akan memaksimalkan juga performasi memory card.


Memory card2 tipe SD/SDHC/SDXC umumnya memiliki "Protected Area" khusus dlm card sebagai fungsi security SD card-nya & tool SD Formatter tdk akan memformat "Protected Area" tsb.


System Requirement:

Operating Systems:

SD/SDHC:
Windows 7
Windows Vista
Windows XP

SDXC:
Windows 7
Windows Vista (SP1 or later)
Windows XP (SP2 or later) with the exFAT file system update (KB955704) 


N.B. Buat yg pake SDXC memory card, instal dulu driver SDXC-nya sebelum colok di slot SD-nya krn kalau tdk, SDXC card-nya tdk akan dikenali dan akan muncul pesan utk memformat di PC. Klo sdh sperti itu, JANGAN format dulu SDXC memory card krn data dlm SDXC card-nya akan terhapus dan file-system pasca format akan berubah ~ device SDXC tdk akan kompatibel.

SD Interface Device:

Berikut interface device yg bisa dipakai utk mengakses SD/SDHC/SDXC memory card:
- Slot SD komputer.
- USB SD reader.
- PC Card, CardBus atau ExpressCard SD adapter.

Pastikan utk selalu konfirmasi jika devicenya kompatibel dgn SD, SDHC atau SDXC memory card sebelum memformat.


CFosSpeed - Utility, which is a network driver, which attaches itself to existing Internet connection and optimizes data transfer by prioritizing traffic. Traffic Shaping - a method for optimizing the Internet traffic, providing the maximum speed with minimum delay. You can use cFosSpeed with a router and / or DSL-modem or cable modem. It is also possible to use with other types of Internet connections. cFosSpeed supports a wide variety of connections such as DSL, cable, ISDN, UMTS, and others.

cFos Traffic Shaping reduces delays during data transfer and allows you to surf the Internet up to three times faster. So that you can use all the speed of your connection!

During the data transfer using TCP / IP receiver sends back a special signal to acknowledge the receipt of data. New data is sent only when confirmation is received. Delay in confirmation of results in slower speeds, forcing the sender to wait. This is especially true of DSL and cable internet, where you downloaded the outgoing channel (which therefore has a small bandwidth) leads to slower download. This is because there are not enough outgoing velocity for confirming signals.

Standard solution to compensate for this effect was to increase the size of the TCP-window that allows you to send more data without immediate confirmation. The main problem here is the increase in ping (latency) and significant delays when rendering Web pages. A delay of up to two seconds is not uncommon for TCP-window size of 512KB. In short, the large size of TCP-window still will not let you get full speed downloads.

On the other hand, cFos Traffic Shaping arranges data by priority in the order that important packets are always earlier than usual. Thus, the evidence always come on time, and the transfer will never clog your connection!


Technology cFos Traffic-Shaping, recognizing the important types of bags and placing them in accordance with the priorities, not only smooths the Internet traffic, but also provides a low-ping. This not only accelerates surfing and download speed increases, but also offers advantages in online gaming.

Using cFos Traffic Shaping bring you tangible benefits such as:
The maximum download speed during the transfer
Stable low response time during the Internet-surfing or in other applications

cFosSpeed has two goals:
1.Sohranit low latency in the network (ping), to make Internet applications as responsive as possible.
2.Uluch**** throughput by removing bottlenecks in the network.

You can use cFosSpeed for Internet connections used only by you or used by multiple computers simultaneously.

Connections:
* Broadband: Cabel and DSL
* Narrow band: Modem and ISDN
* Mobile (UMTS, HSDPA, GSM, GPRS, HSCSD)
* Media:
o DSL, PPPoE
o DSL, PPPoA (Vcmux and LLC)
o DSL, PPTP
o VDSL
o Cable
o ISDN
o IP over AAL
o RFC1483/2684 bridged

Routing:
* Router and dial
* LAN and WLAN
* Modes Router and Bridge
* VPN
* Multiple connections simultaneously
* Adjustable routes
* Several IP adresses per adapter

Traffic Shaping (Traffic Shaping)
* Multi-user version
* TX and RX Shaping
* L7 Protocol Analysis
* Prioritization of Programs
* RTP / VoIP Detection
* 5 priority queues
* Individual rules with filter language

Options:
* Mode low latency
* Auto-MTU optimization

Extras:
* Resources (Budgets) Online
* Usage Graph
* Overview of connections
* Skins
* Firewall (Firewall)
* Data and packet logging
* 32-Bit and 64-Bit version
* 12 languages
What's new? cFosSpeed
---------------------------------------------------------------------------
Legend:
* New feature
+ Improvement
! Software change requires modification of your configuration
x Bugfix
- Information only

Revision history: ---------------------------------------------------------
cFosSpeed 8.03 build 1988

x Tried to fix a Windows 8 bluescreen with DPC_WATCHDOG_VIOLATION (0x133).
Thanks to kittler2 for the dump files. 

Sabtu, 27 Oktober 2012

Click image for larger version.   Name: dl.jpg  Views: 11  Size: 18.3 KB  ID: 51407


Desktop Lock is a computer security protection and access control software product, you can use it to lock computer to prevent people from accessing your private documents and resources. When the computer is locked by Desktop Lock, none can access your documents, browse your computer, or use programs on your computer.

You can lock your computer by one click, or let Desktop Lock to automatically lock your system at any time or when system becomes idle. You can customize the appearances of the locked desktop with the options provided by Desktop Lock. Desktop Lock also supports hotkey to lock the system.


  • Keep people off your computer.
    Once the computer is locked by Desktop Lock, the keyboard and mouse will be totally unavailable, none can use your computer or access your private data. People can not unlock the system without the correct unlock hotkey or unlock password, and can not terminated it with Task Manager. With its advanced features, it can keep locking even someone forced the system to be restarted.
  • Limit users to use only the program you specified.
    Desktop Lock can be configured to lock the system and launch a program or document, so that users can only use the specified program or document.
    It also supports Read-only mode, users can only view the launched program or document, can not operate it.
  • Customize appearances of locked desktop.
    With different lock modes, you can let Desktop Lock keep the current contents of the desktop, activate the current screensaver, or clear the desktop and show picture or video file.
    Your can customize the appearances of the locked desktop, such as background picture, banner etc, you also can let it play audio or video media on the locked desktop.


It's impossible for others to figure out how to unlock

Desktop Lock not only can be set an unlock password, it also supports various unlock methods, such as hotkey, mouse action etc. Only users inputted the correct hotkey or mouse action, the system then will pop up the unlock password dialog box (or unlock the system directly if there is no unlock password set to it).

Unlock hotkey
Unlock hotkey is NOT a common windows hotkey, it can be any string such as your nickname, birthday, or any other characters combination.
Mouse clicks
You can choose Left button click, Right button click or Both left and right button down, and specify a repeat count. For example: right-click 4 times.
Mouse moved
Unlock the system when mouse moved, as the screensavers do. This unlock method should be used with an unlock password.


A.P.E. pada dasarnya adalah bootable USB drive yang bisa digunakan untuk mengcopy file2 SAM dari dalam system Windows, menginstal backdoor, meng-crack password, mengedit file apapun yg diinginkan, dll. Semuanya bisa tanpa butuh password user! A.P.E. berbasis BartPE, tidak seperti BackTrack, A.P.E. didesain lebih utk membantu user menangani system Windows dengan lbh cepat dan mudah. A.P.E. juga dilengkapi network support jadi user bisa menggunakan FTP, atau protocol SSH utk mengirim file2 SAM tsb kemana saja.

Cara Menggunakan A.P.E.:

  1. Download A.P.E dan pasang USB drive.
  2. Jalankan file Ape_USB.exe - (SFX RAR File).
  3. (Klo tdk autorun) jalankan file APE_USB_MAKE.bat.
  4. (Opsional) Konfigurasikan Payload, atau Patch dalam tabel Rainbow Ophcrack.
  5. Selamat ber-prank-ria!!


N.B.:
Cara mem-patch Rainbow Table:
Dengan menggunakan program ISO editor favorit, patch table rainbow-nya kedlm attackpe.iso. File-nya otomatis dibikinkan dalam root USB drive agan setelah menjalankan file "APE_USB_MAKE.bat" atau "Ape_USB.exe". Ikutkan table-nya kedlm folder \ape\ophcrack_pe\tables\. Ingat! Patch table-nya setelah build .iso-nya klo tidak, ophcrack tdk akan bisa boot!

Free Download Software A.P.E. v0.8 - Beta 5:
Part 2
Password: .:n4Rc0:.

Jumat, 26 Oktober 2012

 Anda kesal terus terusan melihat ini ?

Jika ya, ada cara untuk menghentikan Windows 7 untuk berhenti “bertanya”.
  1. Buka Control Panel.
  2. Klik User Accounts.
  3. Pilih Change User Account Control Settings.
  4. Geser ke paling bawah (Never Notify).
  5. Klik OK, lalu restart.
Semoga Membantu,
sumber: utakatikkomputermu

Rabu, 24 Oktober 2012

Pada Windows 7 apabila kita membuka Windows Explorer, secara otomatis yang akan terbuka adalah folder Library, tapi bagaimana kalau kita ingin setiap kali Windows Explorer dibuka, folder yang langsung terbuka adalah folder pilihan kita? Berikut langkahnya..
  1. Klik Start Menu – Accesorries
  2. Klik kanan Windows Explorer, pilih Properties.
  3. Pilih tab Shortcut, perhatikan kolom target.
Secara default tertulis
%windir%\explorer.exe
Untuk merubah folder pertama yang dibuka kita harus menambahkan perintah
/n, /e, [Folder Tujuan]
Contoh : apabila kita menghendaki D:\My Data  yang akan dibuka maka akan jadi seperti ini
%windir%\explorer.exe /n, /e, D:\My Data
Selanjutnya tinggak klik OK. Selamat Mencoba, 

sumber: utakatikkomputermu

Selasa, 23 Oktober 2012

Cara ini menggunakan script batch, cukup copy paste kode dibawah ini kedalam notepad lalu save dengan extension .bat
net stop spooler
DEL %sysdir%\spool\printers\*.* /q
net start spooler
Cara kerja dari script ini adalah menyetop Print Spooler lalu membersihkan antrian Print lalu kemudian menjalankan kembali Print Spooler
Versi Langsung Jadi

sumber: utakatikkomputermu

Senin, 22 Oktober 2012

Copy paste kode dibawah ini kedalam notepad
cls
@ECHO OFF
title Sky-Lock
set username= terserah_agan
set password= terserah_agan
set foldername= nama_folder_agan
set cpanel= "Control Panel.{19FH2390-8AYA-1069-Y9DD-09002B10109D}"
if EXIST %cpanel% goto UNLOCK
if NOT EXIST %foldername% goto NEW_FOLDER
if exist %foldername% goto LOCK
:LOCK
echo
echo
echo
echo Welcome %username% !
echo Kunci %foldername% sekarang ?
pause
ren %foldername% %cpanel%
attrib +h +s %cpanel%
msg * %foldername% is now locked.
goto End
:UNLOCK
echo
echo
echo
echo Welcome !
echo Login dulu sebelum lanjut . . .
set/p "login=Username:"
if %login%== %username% goto USER_VALID
if NOT %login%== %username% goto USER_INVALID
:USER_VALID
set/p "bypass=Password:"
if NOT %bypass%== %password% goto VER_INVALID
echo .
echo .
echo .
echo Login Sukses !
pause
attrib -h -s %cpanel%
ren %cpanel% %foldername%
echo %foldername% sudah dibuka.
START %foldername%
goto End
:VER_INVALID
msg * ERROR : Password SALAH.
goto End
:NEW_FOLDER
md %foldername%
msg * %foldername% sudah dibuat.
goto End
:USER_INVALID
msg * ERROR : Username SALAH.
goto End
:End
lalu save dengan ekstensi .bat
bagian yang dapat diganti adalah
set username= terserah_agan
set password= terserah_agan
set foldername= nama_folder_agan

sumber: utakatikkomputermu

Minggu, 21 Oktober 2012

Ada baiknya apabila kita pisahkan junk files (file – file sampah) dari partisi Windows berada. Hal ini bertujuan untuk menjaga partisi Windows bersih dari file – file sampah sekaligus memudahkan kita untuk membersihkannya secara manual. Dalam artikel kali ini akan saya jelaskan bagaimana agar junk files tersebut disimpan dalam folder yang kita kehendaki, sebagai contoh akan saya gunakan direktori D:\Sampah sebagai tempat pengganti.
Secara default letak folder untuk menyimpan junk files ada di
C:\Windows\Temp
Nah berikut langkahnya :
  1. Klik kanan Computer/My Computer pada Windows Explorer, pilih properties.
  2. Kemudian klik advanced settings (Pengguna Windows XP skip langkah ini, langsung ke langkah 3).
  3. Pilih tab Advanced, kemudian klik Environment Variables (bagian bawah).
  4. Yang akan kita rubah hanya variable TEMP dan TMP, jangan merubah variable yang lain.
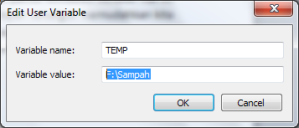
  5. Pada bagian User Variable anda akan melihat dua variable yaitu TEMP dan TMP, klik TEMP lalu klik Edit.
  6. Ganti Variable Value ke direktori yang anda kehendaki, sebagai contoh saya gunakan F:\Sampah (anda bisa gunakan yang lain).
  7. Ulangi langkah diatas pada variable TMP.
  8. Ulangi lagi langkah diatas pada dua variable TEMP dan TMP yang berada pada System Variable.
  9. Klik OK.
Selamat Mencoba, 

Tips : buatlah sebuah partisi kecil khusus untuk menampung Junk Files, 2 GB sudah sangat cukup.

sumber: utakatikkomputermu
Mau Install .Net Framework 4 tapi gagal terus. errornya seperti ini

Bagi teman teman yang mungkin kebetulan mempunyai masalah yang sama ini solusinya :


  1. buka Command Prompt, klik Start – run, lalu ketik cmd
  2. ketik perintah seperti berikut net stop WuAuServ, gunanya ialah mematikan Windows Update sementara
  3. kemudian ketikkan %windir% pada cmd, ini akan membuka tempat anda install Windows, dimana kebanyakan orang C:/Windows
  4. cari folder yang bernama SoftwareDistribution lalu rename menjadi SDold
  5. buka kembali cmd nya lalu ketikkan net start WuAuServ
Rupa rupanya masalahnya karena ada folder temporary dari Windows Update ada yang corrupted, makan solusinya adalah dengan merename nya.
Terbukti berhasil ketika saya coba, .Net Framework ter install tanpa masalah :)

sumber: utakatikkomputermu

Sabtu, 20 Oktober 2012

Teman teman yang menggunakan Windows 7 pasti ada yang merasa kesal karena setiap kali kita menghubungkan flashdisk, nama yang muncul adalah “Removable Storage” bukan nama yang sudah kita tentukan sebelumnya. Sekalipun kita rename sebanyak apapun nama yang muncul tetaplah “Removable Storage”. Bagaimana ini bisa terjadi?
Sebenernya hal ini muncul karena dalam flashdisk terdapat file tersembunyi dan terproteksi bernama “autorun.inf”. Masalah ini cenderung terjadi kepada mereka yang menggunakan Antivirus Lokal SMADAV karena SMADAV mengunci file ini. Masalah ini akan langsung terselesaikan apabila kita menghilangkan “autorun.inf”. Lalu bagaimana kita menghilangkannya?
Ikuti langkah berikut :
Untuk yang bukan pengguna SMADAV
  1. Pada Windows Explorer Klik Organize, lalu pilih Folder and Search Option.
  2. Klik tab View, kemudian pilih show hidden files, folders and drives dan hilangkan tanda centang pada Hide Protected Operating System Files. Klik OK.
  3. Sekarang Windows akan menampilkan semua file tersembunyi dan terproteksi.
  4. Carilah file “autorun.inf” pada flashdisk/harddisk anda kemudian delete file tersebut.
  5. Rename kembali flashdisk/harddisk anda.
  6. Kembalikan Setting ke Default pada Folder and Search Option.
Untuk Pengguna SMADAV.
  1. Buka jendela SMADAV anda.
  2. Pilih tab Tools, kemudian klik tab Smad-Lock.
  3. Disini anda bisa melihat semua drive yang terhubung pada komputer, pastikan status flashdisk anda “Unlocked”. Jika tidak klik flashdisk anda tersebut lalu klik Unlock.
  4. Cabut Flashdisk dan hubungkan kembali. Flashdisk anda seharusnya kembali ke nama yang anda berikan.
Selamat Mencoba, Semoga Membantu.
Catatan : Cara ini dapat digunakan pula untuk masalah yang terjadi pada harddisk.

sumber: utakatikkomputermu

Jumat, 19 Oktober 2012

Sebelum menggunakan Kamus Digital ini, install terlebih dahulu aplikasi WinDjvu. Bila belum punya, silahkan klik disini untuk mengunduhnya.

Free Download Kamus Al-Munawwir Digital DISINI


sumber: ma-tasikmalaya
Revo Uninstaller merupakan utilities software yang mempunyai fungsi seperti halnya YourUninstaller. Revo Uninstaller merupakan sebuah program yang dapat membantu sobat blogger untuk uninstall program-program yang sudah tidak di perlukan lagi. dan meremove file-file sampah yang memberatkan kinerja pc/laptop anda.


feature :

  • Auto Start Manager
  • Windows Tools Manager
  • Junk File Cleaner
  • Browsers History Cleaner
  • Office History Cleaner
  • Windows History Cleaner
  • Unrecoverable Delete Tool
  • Evidence Remover


Password : www.remo-xp.com

Rabu, 17 Oktober 2012

****

avast! Internet Security 7 (latest generation)
  1. The fastest antivirus for Windows (tested by AV-Comparatives.org)
  2. Certified antivirus with anti-spyware
  3. Online shopping and banking, with total privacy (SafeZone™)
  4. Worry-free web surfing and social networking
  5. Ability to clean your PC before Windows even starts

Cara Penggunaan Crack:
1. Install [Avast PRO] or [Avast Internet Security] as trail (DEMO)

2. Disable Self-Protection module from Avast.
You can re-enable it later.

3. XP users please double click [AVAST XP ZeNiX.reg] to activate my 2050.

4. Run [Avast 2050 by ZeNiX], and reboot.

5. Done

You can enable Avast's autoupdate with 2050.
You can re-enable Avast's Self-Protection module now.

Please always use your own license or DEMO license.

    Untuk kesekian kali nya IDM mengeluarkan versi terbaru nya yakni IDM 6.12 Build 22, fitur terbaru yang ada dalam IDM 6.12 build 22 ini adalah sudah support untuk firefox 18, silakan buat sobat yang ingin coba.


    what's new in version 6.12 Final Build 22 :
    (released :10/10/2012)
    • added support for firefox 18


    Password : www.remo-xp.com

    sumber: remo-xp

    Senin, 15 Oktober 2012


    Fix your slow PC, eliminate registry errors and improve your PC performance easily with Regclean Pro.

    If you are experiencing the following problems, your PC’s registry may be damaged:
    Your PC is relatively new but its performance drags
    You get random Blue screens (BSODs)
    Your PC freezes frequently
    Your PC crashes without any reason
    You get common Windows errors
    Programs open slowly and hang repeatedly

    Registry is a critical part of Windows. Since the registry is in constant use due to regular PC usage, it can get cluttered over time. Installing and removing software regularly and even moving and accessing data on the PC creates more and more registry entries, thereby increasing its size and deteriorating the systems performance.

    Regclean Pro cleans such invalid registry errors using its advanced scan engine. It not only fixes invalid registry entries, it also defragments the registry, keeping it streamlined for smoother system performance. You don’t have to be a computer expert to use this Regclean Pro. The interface makes it easy to fix all registry errors easily and quickly even for novice users.

    Registry cleaners should be used on a regular basis to remove obsolete and invalid entries from the Windows registry. The advanced scan engine of Regclean Pro detects and fixes invalid registry entries automatically with a few simple clicks.

    * Faster system speed

    Cleaning invalid registry errors increases application response times. This results in faster access to programs and applications.

    * Smooth operation

    An uncluttered registry enhances overall system performance and results in an over smoother system performance.

    * A more stable system

    Regularly fixing registry errors minimizes random system crashes, BSODs and frequent runtime errors. This provides a more stable environment to work in.

    * Fewer error messages

    To prevent common Windows error messages, it is recommended to clean the registry from time to time.

    * Safe and reliable

    Regclean Pro provides complete undo functionality. A full backup of the registry is taken before fixing registry errors so changes can be reversed, if required.

    Home Page - http://www.systweak.com/RegistryCleaner/Overview/

    Minggu, 14 Oktober 2012

    PESEdit.com 2013 Demo Patch 2.0 + Kitserver compatibility & 2.01 memiliki Penambahan 26 full tim update di PES 2013 Demo (+ 8 tim yang sudah ada!)

    Daftar Tim Baru:
    Arsenal, Chelsea, Liverpool, Manchester City, Manchester United, Newcastle, Tottenham, Montpellier, Paris, Dortmund, Bayern, Gladbach, Schalke, Bielefeld, Paderborn, Inter, Juventus, Milan, Napoli, Benfica, Athletic Club, Atletico, Barcelona, Malaga, Real Madrid, Valencia.


    Features:
    • 44 balls selection
    • Full squads, latest transfers & shirt numbers
    • Faces for almost all players
    • Correct 12/13 kits including configuration
    • Original demo teams available too

    How to use: (kitserver version)
    • Copy the content of the folder "PES 2013 DEMO" to the PES 2013 Demo installation directory on your PC
    • Copy the content of the Kitserver update "PES 2013 DEMO" folder to the PES 2013 Demo installation directory on your PC (replace files if asked)
    • Copy all folders from "PES 2013 DEMO/kfs/pesedit" to "PES 2013 DEMO/kitserver/pesedit/img" (don't replace files if asked)
    • Start game with "pes2013.exe"

    How to use: (no kitserver version)
    • Install dokan (DokanInstall_0.6.0.exe in dokan folder)
    • Copy the content of the folder "PES 2013 DEMO" to the PES 2013 Demo installation directory on your PC
    • Start the game with 'pes2013demolauncher.exe'

    Free Download PESEdit.com 2013 Demo Patch 2.0 :
    Part 1 | Part 2 | Part 3 (Sharebeast)
    Free Downlaod Kitserver compatibility & 2.01 (am4shared)
    Free Downlaod Kitserver compatibility & 2.01 (Mediafire)
    Password : www.remo-xp.com

    sumber; remo-xp

    Sabtu, 13 Oktober 2012


    Untuk Pengguna PC:

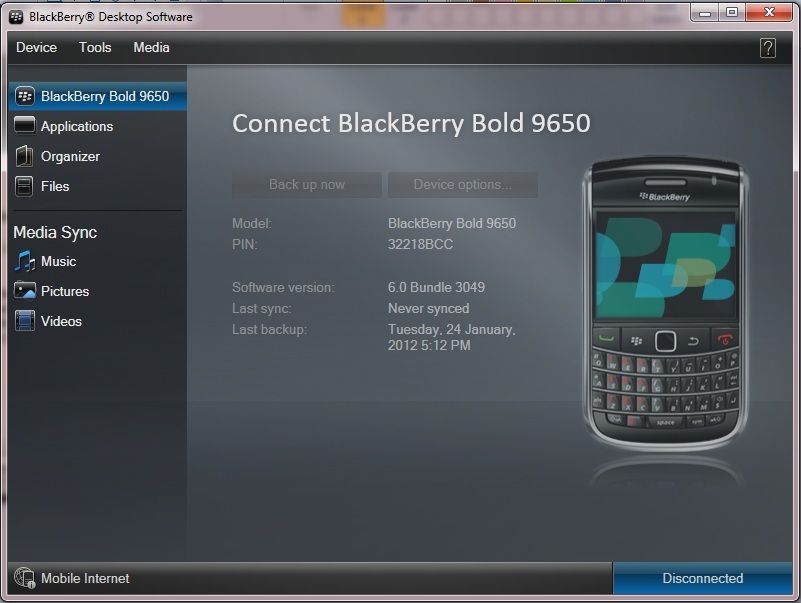
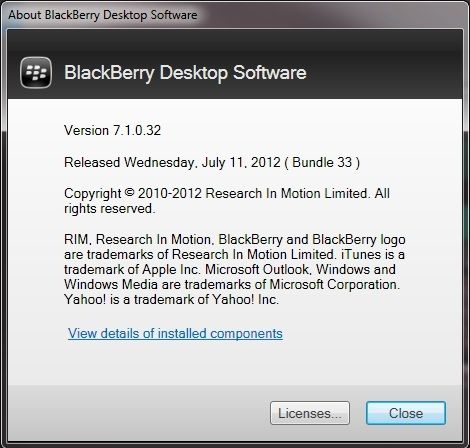
    BlackBerry® Desktop Software untuk PC mendeteksi sambungan antara smartphone BlackBerry, account email, kalender, dan sebagainya. Kini, dengan BlackBerry Desktop Software 7, Anda dapat mengelola sambungan ini dengan mudah.


     Untuk Pengguna Mac:

    BlackBerry Desktop Software untuk Mac akan mensinkronisasi kontak, kalender, serta janji antara komputer dan smartphone. Perangkat lunak ini juga dapat digunakan untuk mentransfer video, album iPhoto, serta lagu dan daftar putar iTunes.


    Password: autis4ever


    1-Click Boosting Game Performance Enhanced
    Game Booster v3 can easily and fast-close background processes and unnecessary Windows services, to speed up your game playing and avoid possible conflicts and incompatibility. With the innovative "Enhanced 3rd parties' services detection" technology, Game Booster v3 can automatically detect and close more unnecessary background services.

    Pure Gaming Environment with "Game Desktop" New!
    Game Booster 3 now is able to provide you a pure "gaming environment" that leaves only the gaming window on the desktop; thus you will not be disturbed by other programs during your gaming.

    Tweaks System for Top PC Performance Enhanced[SPOILER][/SPOILER]
    Game Booster v3 can tweak your PC for the ultimate system and Internet speed with a single click.

    Create Your Own Game Box Enhanced
    Add and manage your games in a game box and boost the game automatically with Game Booster 3 when launching.


    Jumat, 12 Oktober 2012


    Nitro Pro 8 lets you easily create industry-standard PDF files from almost any file format.

    And sharing is seamless: any PDF created in Nitro Pro can be opened and viewed on virtually any machine, and will display identically to what you intended it to.

    Create + Combine
    Nitro Pro 8 lets you quickly and easily create professional-quality PDF documents from any format or content type: paper scans, spreadsheets, presentations, reports, and more.

    Edit Text + Images
    Add, manipulate, replace, and correct text and images in PDF files with intuitive editing tools. Extract and delete individual pages from documents.

    Convert + Export
    Nitro Pro 8 lets you easily reuse and repurpose text, images, or entire documents, with tools to accurately convert and extract PDF files and their content.

    Scan + OCR
    Apply Optical Character Recognition (OCR) to image- and paper-based documents and create searchable and/or editable layers of text for digital archival.

    Collaborate + Review
    Review and markup PDF files faster with a range of text- and shape-based annotations. Easily involve multiple contributors with tools to track, sort, and manage individual comments

    Sign + Certify
    Electronically sign and return documents in seconds with QuickSign™ and streamline certifiable digital signature workflows with one-click, reusable profiles. Certify and approve documents with preset and customizable dynamic stamps that include the time, date, location, and author.

    Control + Protect
    Control document access and usage with individual user permissions and digital IDs. Protect confidential information using military-grade 256-bit and remove sensitive content with Redaction.

    Electronic Forms
    Create and distribute custom forms to gather information that are as intuitive as their paper counterparts – but much more efficient – and easily fill, submit, and save PDF forms

    System Requirements
    • Desktops: Windows® XP, Windows® Vista, Windows® 7, Windows 8
    • Servers: Windows® Server 2003, Windows® Server 2008, Windows® Server 2008 R2 (Terminal Server and Citrix XenApp/Access Essentials configurations supported.) For more on server-side deployment, check out the Citrix and Terminal Server software page.
    • Processor: 1 gigahertz (GHz) or faster processor
    • RAM: 1 GB system memory (2 GB recommended)
    • Display: 1024x768 screen resolution
    • Hard disk space: 300 MB of available hard disk space
    Nitro Pro 8 Is Available In:
    English
    French
    Italian
    Dutch
    Spanish

    Kamis, 11 Oktober 2012


    Click image for larger version.   Name: 1312722786_teracopy-pro-v2.12.jpg  Views: 59  Size: 8.2 KB  ID: 27123
    TeraCopy is a compact program designed to copy and move files at the maximum possible speed, providing the user a lot of features.

    - Copy files faster. TeraCopy uses dynamically adjusted buffers to reduce seek times. Asynchronous copy speeds up file transfer between two physical hard drives.
    - Pause and resume file transfers. Pause copy process at any time to free up system resources and continue with a single click.
    - Error recovery. In case of copy error, TeraCopy will try several times and in the worse case just skips the file, not terminating the entire transfer.
    - Interactive file list. TeraCopy shows failed file transfers and lets you fix the problem and recopy only problem files.
    - Shell integration. TeraCopy can completely replace Explorer copy and move functions, allowing you work with files as usual.
    - Full Unicode support.
    - Windows 7 x64 support.

    TeraCopy Pro
    - You can also buy a Pro version of the program that lets you do the following:
    - Copy/move to favorite folders.
    - Select files with the same extension/same folder.
    - Remove selected files from the copy queue.
    - Get free updates and priority support.
    - More features coming soon!


    Password: gdx38

    Name:  6497572afd865c64ef0b124c0d81a34d.jpg Views: 187 Size:  6.3 KB

    Description: Enjoy your HD videos, photos and music in your preferred formats on more devices at home with the new Nero 12 Platinum multimedia suite. Nero 12 Platinum comes with seven of Nero’s beloved applications, plus tons of video effects, themes and templates that let you unleash the full power of your HD content. It’s all bundled together in one tightly integrated, high-performance package that lets you get the results you want – fast.

    What’s New in Nero 12 Platinum?: Watch all your Blu-ray Discs on your PC, even Blu-ray 3D* Convert Blu-ray 3D to 2D HD- and SD-video file formats Rip Blu-ray Disc to virtually any video file format** Import and convert digital or analog movies to Blu-ray Disc, DVD or virtually any file format*** Span data efficiently across multiple CDs, DVDs and Blu-ray Discs Burn self-starting CDs, DVDs and Blu-ray Discs Import, edit and export videos in high-definition AVCHD Progressive (50p/60p) format Rip AVCHD to virtually any video file format Quickly output AVCHD Progressive format video with SmartEncoding Stabilize shaky videos from smartphones and handheld cameras Hundreds more video effects and retro movie theme templates Backup to hard drives larger than 2TB and USB 3.0 storage devices Stream movies, music and photos to streaming-enabled HDTVs, game consoles and mobile devices


    Rabu, 10 Oktober 2012


    Tips, Trick dan Cara Download File Di Mediafire yang Suspended :
    1. Siapkan Link Mediafire yang terkena suspended
    2. Masuk ke web ini  TuxFire
    3. Masuk ke bagian Tab "Download suspended file"
    4. Input link mediafire(link suspended) yang ingin di download ke kotak yang sudah di sediakan, kemudian klik "Generate New Link"
    5. Setelah proses loading akan muncul link mediafire baru, klik kanan link tersebut pilih "Copy Link Location"
    6. Masuk ke Tab "Generate download link", paste link yang sudah di copy tadi ke kotak yang disediakan
    7. Copy sharing code berikut 7e5e03b8e9035daa018f5cbc5a3938e6f1bc2f2f ke kotak "If files are private , enter the sharing code :"
    8. klik "Generate" nanti akan muncul Link yang siap di download.
    9. Enjoy!

    Tips, Trick dan Cara Download File Di Mediafire yang File Private:
    Langsung Di ComoT diSini
    Selamat malam semuanya. Pada postingan kali ini saya akan membagikan ilmu tentang membuat pendingin/kipas modem sendiri dengan bahan-bahan yang murah dan pembuatan yang sederhana. Seringkali karena terlalu lama kita berselancar di internet, modem kita menjadi overheat. Hal ini dapat berakibat fatal kepada modem kita, untuk itu mari kita membuat pendingin untuk modem kesayangan kita.


    • Bahan-bahan yang dibutuhkan :


      1. Gunting
      2. Selotip
      3. Modem
      4. Kabel USB extensio (Harga Rp.5.000)
      5. Kipas HSF untuk VGA (Harga Rp.15.000)
      6. Alumunium (Pada tutorial ini aluminium yang digunakan bekas antena Indoor TV)


    • Potong ujung kabel 'female' USB extension-nya, nanti di dalamnya ada 4 warna kabel. Kabel USB ada dua tipe:black-green-white-red (tipe1) dan yellow-red-green-white (tipe2). sedangkan untuk jalur listriknya: black & red (tipe1), yellow & white (tipe2). Karena pada pembuatan kali ini saya memakai USB tipe 1 jadi saya memotong semua kabel warna lainnya kecuali warna black & red


    • Potong ujung Kipas HSF, kemudian sambungkan dengan kabel USB tadi. Sambungkan warna red dengan red dan warna black dengan black.


    • Tempel modem ke kipas HSF kemudian pasang alumunium ke body modem, kemudian sesuaikan aluminium tersebut dengan body modem.


    • Lubangi aluminium, sesuaikan dengan tempat sekrup pada kipas HSF.


    • Selamat Pendingin Modem anda telah selesai!

    Pendingin anda telah selasai dan sekarang silahkan berselancar dan mendownload sepuas-puasnya tanpa khawatir dengan panas modem anda.

    NB: Kami cuma Sharing Jadi Jika mau bertanya lgsg masuk disini

    Selasa, 09 Oktober 2012

    Captcha Sniper intercepts calls made to most popular captcha solving services including Decaptcha, Death By Captcha, AntiCaptcha and Bypass Captcha. Captcha Sniper solves the captcha and returns the answer to the calling software and also includes a command line interface. Captcha Sniper currently supports the following platforms and their associated captchas:

    Platform/FootprintCaptcha ImageSuccess Rate
    WordPress Blogs
    76%
    Typepad/Movable Type Blogs41%
    Lifetime Blogs100%
    BlogEngine Blogs71%

    74%

    76%
    B2Evolution Blogs48%
    ArticleMS Article Directories64%
    Pligg Bookmarking73%

    90%
    PHPLD Directories98%

    25/50%

    48%
    Mercury Board Forums66%
    phpBB2 Forums61%
    PunBB Forums90%

    85%

    55%

    99%
    SMF Forums64%

    27%
    Yabb Forums97%
    AkoBook Guestbook83%
    BellaBook Guestbook100%
    Guestbook Script50%
    Perl Guestbook100%
    Phoca Guestbook77%

    75%
    PhpBook Guestbook100%
    Ricar Guestbook100%
    Silentrum Guestbook77%
    Generic Guestbook #177%
    Pixel Post Image Gallery98%
    Article PLR Script89%
    FreeGlobes Directories94%
    Zen Photo Image Galleries


    78%
    Password : fuse123
    Related Posts Plugin for WordPress, Blogger...
     
    Copyright (c) 2010 Art Chrome. Design by Wordpress Themes.

    Themes Lovers, Download Blogger Templates And Blogger Templates.